Pushbutton
Posted in Planning , on
One of the things that complicated our assembly was the question of how to make the only man-machine interface on DURR Beta; the pushbutton on its side.
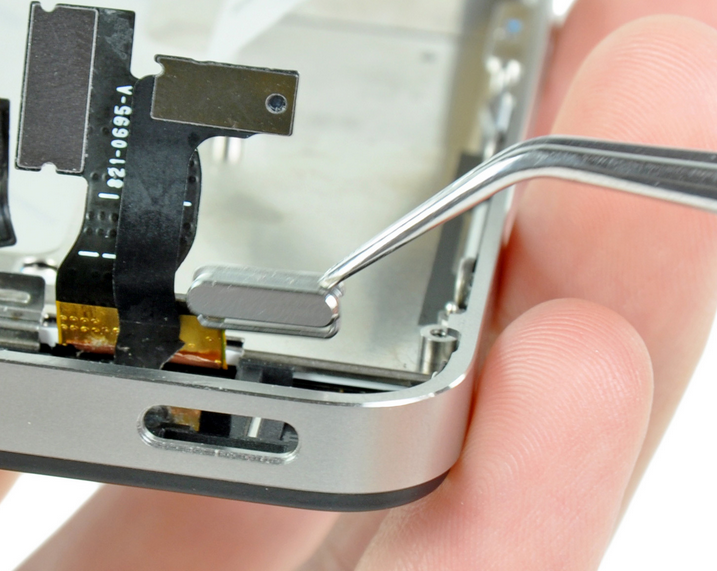
In most products with buttons, like a mobile phone, you have a teeny tiny plastic/ metal inset that is the pushbutton interface. This is in order to access the PCB's actual pushbutton through a casing's wall thickness, but also to style the button; shape, materials, add graphics, etc.
This piece is often so small (our button is 3.2 mm in diameter and 2.2 mm in length) that it usually needs high volume manufacturing techniques, like injection molding or forging. With other words, manufacturing techniques we couldn't afford. Also it couldn't be separately 3D-printed, because every service's guidelines on minimum part size (which we totally get).
[ image of an iPhone 4's lock button from iFixit ]
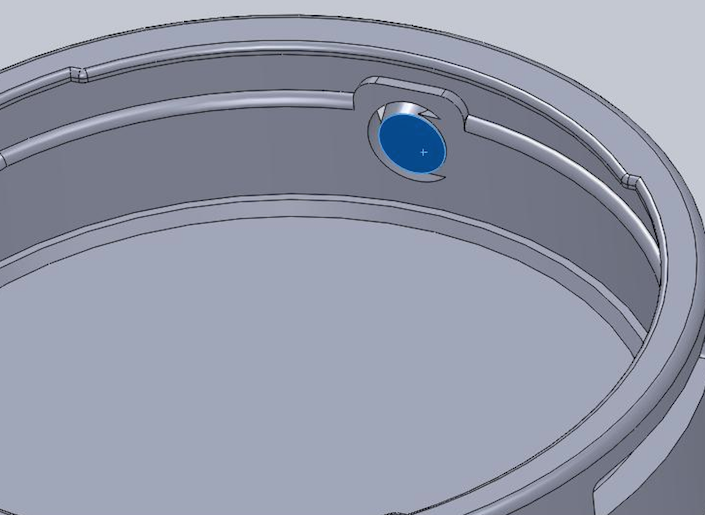
Other products, like e.g. many computer mice, use their casing material's flexibility in combination with cuts in the geometry; something we actually used for the Alpha version. Unfortunately, this was not an option for the Beta.
[image of the Alpha's pushbutton interface]
We chose to have the button interface in the same part as the back cover. It was a valid option; economic by sparing us an extra part, but complicated the assembly in a manner of ways:
· The stem, which the button was fixed to, needed to be flexible - but not so thin that it broke off during printing and handling. Touch and go stuff...
· The PCB needed to be fixed to the back cover and mounted inside the aluminum casing
together with
, not
before
, the back cover. Or else, you won't be able to insert the button. This at least did the alignment job for the PCB inside the body.
· When assembling the SLS back cover with PCB attached, the whole thing had to enter the casing tilted. This required extra accuracy and concentration during assembly, so the double sided insulating tape on the PCB didn't bond to the aluminum prematurely. Also, it resulted in a reduction of snap hooks in some areas.
· Cylinders (however tiny, our button is one) sintered perpendicular to the z-axis in the SLS machine chamber turns out rough. Yes, we knew... but it was a sensible trade-off.
· If the DURR unit needed to be disassembled, the button would be torn off, though staying in its place. The straps aren't replaceable and there's really no reason to open the back cover. Still, this isn't optimal.
[image of the Beta assembly]

[assembly is also shown ~1:18 in the work doc movie]
Ideally, the button would perhaps been a forged aluminum button, maybe anodized in the same color as casing and buckle... Anyhow, SLS plastic is nice, tho in a side-by-side comparison to the slick aluminum, it's ... basically up to snuff.
All in all, we're happy with the pushbutton and how the assembly worked out, especially for our budget and volume!
Show all posts about Manufacturing
Show all posts about News
Show all posts about Planning
Show all posts about Shipping